1. 首页index
---
# https://vitepress.dev/reference/default-theme-home-page
layout: home

hero:
  name: "橙子的文档站"
  text: " "
  tagline: 好记性不如烂笔头
  image:
    src: /logo.png
    alt: logo
  actions:
    - theme: brand
      text: 目录
      link: /Miscellaneous/Toc
    - theme: alt
      text: Vitepress
      link: /Vitepress/Vitepress
    - theme: brand
      text: 🎮Minecraft
      link: /Mc/Purpur-1.20.1


features:
  - icon: 🐟
    title: Feature A
    details: 天天喜欢摸大鱼🐟<br>分享自己对知识海洋探索历程
  - icon: 📝
    title: Feature B
    details: 相信你可以在这里找到对你有用的知识和教程
  - icon: 💻️
    title: Feature C
    details: 摸鱼不是偷懒,是为了保持心态平衡
    link: https://baidu.com
    linkText: 了解更多
---2. 侧边栏Sidebar的设置
2.1 侧边栏基本配置
侧边栏SideBar是文档的主导航模块,可以在config.mts 文件中设置。打开文件,可以看到这样的代码。
sidebar: [
      {
        text: 'Examples',
        items: [
          { text: 'Markdown Examples', link: '/markdown-examples' },
          { text: 'Runtime API Examples', link: '/api-examples' }
        ]
      }
],这就是VitePress给我们生成的默认侧边栏。第一个text是侧边栏显示的文字,比如我们要设置侧边栏显示的内容是VitePress,修改这部分即可。下面的items是一个数组,里边就是导航栏的设置了。里边的text为导航文字,link为链接地址。
3. 形成单独页面
我的建议是一定要把侧边栏独立出一个文件,因为你每多一篇文章,侧边栏都会多一项配置(你可以用Python写个自动生成,担任这需要你会点编程知识)。
首先我们需要在 /.vitepress 文件夹下,新建一个名为 sidebar.mts的文件 ,编写如下代码。
export default [
      {
        text: 'Examples',
        items: [
          { text: 'Markdown Examples', link: '/markdown-examples' },
          { text: 'Runtime API Examples', link: '/api-examples' }
        ]
      }
]再到 config.mts 页面中引入sidebar.mts 并使用。
import sidebar from './sidebar.mjs'
//....

themeConfig: {
  sidebar:sidebar,
}这样sidebar配置项就被独立出来了。
4. 动态显示侧边栏
这时候有个需求,我希望动态的显示侧边栏,而不是一直固定不变。比如我们点到VitePress的教程里,就显示VitePress的所有章节导航。而点击 “生活分享”时 ,就先不显示侧边栏。 这时候需要在Sidebar配置的最前面,用字符串的形式,加上 链接路径, 路径匹配成功,显示对应的侧边栏。
这里我给出我现在网站的侧边栏设置。
export default {
    '/Miscellaneous': [
      {
        text: '📁 目录',
        collapsed: false,
        items: [
          { text: 'Toc', link: '/Miscellaneous/Toc' },
          { text: '图标', link: '/Miscellaneous/icon' },
          { text: 'Vitepress 本地安装', link: '/Vitepress/Vitepress' },
          { text: '我的世界Purpur-1.20.1服务器', link: '/Vitepress/Vitepress' },
        ]
      }
    ],
    '/Vitepress': [
      {
        text: '📗 Vitepress 搭建',
        collapsed: false,
        items: [
          { text: 'Vitepress 本地安装', link: '/Vitepress/Vitepress' },
          { text: '自定义主题使用', link: '/Vitepress/主题使用' },
        ]
      }
    ],
    '/Mc/Purpur-1.20.1': [
      {
        text: '🎮Minecraft-1.20.1-服务端',
        collapsed: false,
        items: [
          { text: '1. 基本介绍', link: '/Mc/Purpur-1.20.1/' },
          { text: '2. 插件列表', link: '/Mc/Purpur-1.20.1/插件列表' },
          { text: '3. 权限列表', link: '/Mc/Purpur-1.20.1/权限列表' },
          { text: '4. 变量列表', link: '/Mc/Purpur-1.20.1/变量列表' },
          { text: '5.1. [参考]优化-1', link: '/Mc/Purpur-1.20.1/优化-1' },
          { text: '5.2. [参考]优化-2', link: '/Mc/Purpur-1.20.1/优化-2' },
        ]
      }
    ],
    // 示例注释代码
    // '/A/02': [
    //   {
    //     text: 'A',
    //     collapsed: false,
    //     items: [
    //       { text: 'B', link: 'B' },
    //     ]
    //   }
    // ]
};这样就实现了动态设置侧边导航栏了。
5. 折叠设置
当你的侧边栏很多时,折叠起来会让网站变的美观 。这时候你就可以使用 collapsed选项,它会显示一个切换按钮来隐藏/显示每个部分。
为了实现折叠效果,可以将Vitepress课程的侧边栏改造为Vitepress和Mc两个部分。
export default {
    '/Miscellaneous': [
      {
        text: '📁 目录',
        items: [
          { text: 'Toc', link: '/Miscellaneous/Toc' },
          { text: '图标', link: '/Miscellaneous/icon' },
          { text: 'Vitepress 本地安装', link: '/Vitepress/Vitepress' },
          { text: '我的世界Purpur-1.20.1服务器', link: '/Vitepress/Vitepress' },
        ]
      }
    ],
    '/Vitepress': [
      {
        text: '📗 Vitepress 搭建',
        items: [
          { text: 'Vitepress 本地安装', link: '/Vitepress/Vitepress' },
          { text: '自定义主题使用', link: '/Vitepress/主题使用' },
        ]
      }
    ],
    '/Mc/Purpur-1.20.1': [
      {
        text: '🎮Minecraft-1.20.1-服务端',
        items: [
          { text: '1. 基本介绍', link: '/Mc/Purpur-1.20.1/' },
          { text: '2. 插件列表', link: '/Mc/Purpur-1.20.1/插件列表' },
          { text: '3. 权限列表', link: '/Mc/Purpur-1.20.1/权限列表' },
          { text: '4. 变量列表', link: '/Mc/Purpur-1.20.1/变量列表' },
          { text: '5.1. [参考]优化-1', link: '/Mc/Purpur-1.20.1/优化-1' },
          { text: '5.2. [参考]优化-2', link: '/Mc/Purpur-1.20.1/优化-2' },
        ]
      }
    ],
};在刚才的 Vitepress导航部分加上collapsed选项,然后赋予值为true。这时候侧边栏就变成了折叠状态
export default {
    '/Miscellaneous': [
      {
        text: '📁 目录',
        collapsed: true,
        items: [
          { text: 'Toc', link: '/Miscellaneous/Toc' },
          { text: '图标', link: '/Miscellaneous/icon' },
          { text: 'Vitepress 本地安装', link: '/Vitepress/Vitepress' },
          { text: '我的世界Purpur-1.20.1服务器', link: '/Vitepress/Vitepress' },
        ]
      }
    ],
    '/Vitepress': [
      {
        text: '📗 Vitepress 搭建',
        collapsed: true,
        items: [
          { text: 'Vitepress 本地安装', link: '/Vitepress/Vitepress' },
          { text: '自定义主题使用', link: '/Vitepress/主题使用' },
        ]
      }
    ],
    '/Mc/Purpur-1.20.1': [
      {
        text: '🎮Minecraft-1.20.1-服务端',
        collapsed: true,
        items: [
          { text: '1. 基本介绍', link: '/Mc/Purpur-1.20.1/' },
          { text: '2. 插件列表', link: '/Mc/Purpur-1.20.1/插件列表' },
          { text: '3. 权限列表', link: '/Mc/Purpur-1.20.1/权限列表' },
          { text: '4. 变量列表', link: '/Mc/Purpur-1.20.1/变量列表' },
          { text: '5.1. [参考]优化-1', link: '/Mc/Purpur-1.20.1/优化-1' },
          { text: '5.2. [参考]优化-2', link: '/Mc/Purpur-1.20.1/优化-2' },
        ]
      }
    ],
};这时候再进入时侧边栏就是折叠状态了
站点标题和图标/Logo(左上角)
export default defineConfigWithTheme({
  themeConfig: {
    logo: '/my-logo.svg',
    siteTitle: "Orange Docs"	//添加图标时,它会与站点标题一起显示。如果只需要图标并且想要隐藏站点标题文本,请将 siteTitle 选项设置为 false。
  }
}).
├─ docs
│ ├─ .vitepress
│ │ └─ config.mts <-- 配置文件已由ts变成mts
│ └─ public <--静态资源目录
│ │ └─ logo.png <--logo
│ └─ index.md
└─ package.jsonFav图标
路径默认public目录,在 docs目录下新建 public目录即可
export default defineConfigWithTheme({

  //fav图标
  head: [
    ['link',{ rel: 'icon', href: '/logo.ico'}],
  ],
})网页标题
使用 titleTemplate 自定义整个网页标题
export default defineConfigWithTheme({
  lang: 'zh-CN',
  title: "橙子的文档站",
  description: "Orange Docs",
  titleTemplate: 'Orange Docs'  // 副标题
})多语言
要启用多语言支持,首先需要使用如下的文件目录结构
.
├─ docs
│  ├─ en
│  │  ├─ index.md   <--英文首页
│  │  ├─ ...
│  │  ...
│  └─ fr
│  │  ├─ index.md   <--法语首页
│  │  ├─ ...
│  │  ...
│  └─ index.md      <--中文首页(默认)
└─ package.json提示 实际就是新建一个语言目录,再把根目录所有文档,翻译后再放进去 本次仅演示下首页,其他的自行配置吧!
默认读取目录的index文件,无需手动填写 index
export default defineConfigWithTheme({

  //多语言
  locales: {
    root: {
      label: '简体中文',
      lang: 'Zh_CN',
    },
    en: {
      label: 'English',
      lang: 'en',
      link: '/en/',
    },
    fr: {
      label: 'French',
      lang: 'fr',
      link: '/fr/',
    }
  },

})导航菜单(右上角)
一个基础的导航,首页、文章路径以及外站链接。
Nav 配置有两种方式,直接点击跳转和下拉菜单样式。详情参考以下配置信息。 主要有以下字段:
link:当触发点击事件时跳转的地址;可以是外链也可以是项目内的路径。activeMatch: 需要被高亮的nav。即无论左侧边栏如何切换,都保证该nav是高亮状态text:显示到页面的信息。
信息 text是导航中显示的文本 link为链接或者实际文件的路径,不带
.md前缀,并始终以/开头
export default defineConfigWithTheme({

  themeConfig: {
    //导航栏
    nav: [
      { text: '首页', link: '/' },
      { text: '快速上手', link: '/getting-started' },
      { text: 'VitePress', link: 'https://vitepress.dev/' },
    ],
  },

})若想要下拉式菜单导航,就需要加一个 iteams
export default defineConfigWithTheme({

  themeConfig: {
    //导航栏
    nav: [
      { text: '首页', link: '/' },
      {
        text: '指南',
        items: [
          { text: '前言', link: '/preface' },
          { text: '快速上手', link: '/getting-started' },
          { text: '配置', link: '/configuration' }
        ]
      },
      { text: 'VitePress', link: 'https://vitepress.dev/' },
    ],
  },

})给下拉菜单赋予分组标题,就要再次嵌套 iteams
export default defineConfigWithTheme({

  themeConfig: {
    //导航栏
    nav: [
      { text: '首页', link: '/' },
      {
        text: '指南',
        items: [
          {
            // 分组标题1
            text: '介绍',
            items: [
              { text: '前言', link: '/preface' },
            ],
          },
          {
            // 分组标题2
            text: '基础设置',
            items: [
              { text: '快速上手', link: '/getting-started' },
              { text: '配置', link: '/configuration' },
              { text: '页面', link: '/page' },
              { text: 'Frontmatter', link: '/frontmatter' },
            ],
          },
          {
            // 分组标题3
            text: '进阶玩法',
            items: [
              { text: 'Markdown', link: '/Markdown' },
              { text: '静态部署', link: '/assets' },
            ],
          },
        ],
      },
      { text: 'VitePress', link: 'https://vitepress.dev/' },
    ],
  },

})为导航菜单配置专门的配置文件
由于导航菜单的配置可能很多,因此建议为其创建单独的配置文件,然后再在主配置文件中引入:
.vitepress/relaConf/index.mts 配置内容较多,单独起个文件
export * from './navbar';.vitepress/relaConf/navbar.mts
import { DefaultTheme } from 'vitepress';
export const nav: DefaultTheme.NavItem[] = [
    { text: '首页', link: '/' },
    { text: 'Vitepress', link: '/Vitepress/Vitepress' },
    { text: '🎮Minecraft', link: '/Mc/Purpur-1.20.1/' },
	// { text: 'Oracle', link: '/Oracle', activeMatch: '/Oracle/what-is-vitepress' },
	// {
	//   text: 'Oracle',
    //   items: [
	// 		 { text: 'RMAN',link:'/oracle/rman/'} //点击后跳转到docs/oracle/rman/index.md文件
    //   ]
	// },
	// {
	//   text: '下拉选择框',
	//   items: [
    //             { text: 'options-1', link: '/' },
    //             { text: 'options-2', link: 'http://www.baidu.com' }
    //           ]
	// }
];社交链接
社交链接 严格来说不算 nav 范畴,但是显示位置基本相同。
icon:discordfacebookgithubinstagramlinkedinslacktwitteryoutube或者svg字符串link:跳转链接。
export default defineConfigWithTheme({

  themeConfig: {
    //社交链接
    socialLinks: [
      { icon: 'github',
       link: 'https://github.com/vuejs/vitepress',
       //您也可以包含一个自定义标签以实现可访问性(可选但推荐):
        ariaLabel: 'Github'
      },
      { icon: 'twitter', link: 'https://twitter.com/' },
      { icon: 'discord', link: 'https://chat.vitejs.dev/' },
    ],
  },

})本地搜索
得益于 minisearch,VitePress 支持使用浏览器内索引进行模糊全文搜索。要启用此功能,只需在 .vitepress/config.ts 文件中将 themeConfig.search.provider 选项设置为 'local' 即可:
export default defineConfigWithTheme({

  themeConfig: {
    //本地搜索
    search: {
      provider: 'local'
    },
  },

})如果你搭建了多语言站点,可以更细致的配置搜索
export default defineConfigWithTheme({

  themeConfig: {
    //本地搜索
    search: {
      provider: 'local',
      options: {
        locales: {
          root: {
            translations: {
              button: {
                buttonText: '搜索文档',
                buttonAriaLabel: '搜索文档'
              },
              modal: {
                noResultsText: '无法找到相关结果',
                resetButtonTitle: '清除查询条件',
                footer: {
                  selectText: '选择',
                  navigateText: '切换',
                  closeText: '关闭'
                }
              }
            }
          }
        }
      }
    },

})页脚
配置好 themeConfig.footer,VitePress 将在全局页面底部显示页脚。
export default defineConfigWithTheme({

  themeConfig: {
    //页脚
    footer: {
      message: '橙子的文档站',
      copyright: 'Copyright © 2023-2024 🍊',
    },
  },

})上面的配置也支持 HTML 字符串。所以,例如,如果你有备案,会需要跳转到工信部,使用html代码就行了:
export default defineConfigWithTheme({

  themeConfig: {
    //页脚
    footer: {
      message: '橙子的文档站',
      copyright: 'Copyright © 2023-2024 🍊 备案号:<a href="https://beian.miit.gov.cn/" target="_blank">京****号</a>',
    },
  },

})提示 请注意,当侧边栏可见时,不会显示页脚。
侧边栏
基本配置
最简单的形式是传递单个链接,侧边栏是文档的主要导航块。可以在 themeConfig.sidebar 中配置侧边栏菜单。
text`文字可以自定义,`link` 填文章路径,不需要带`.md每个 link 都应指定以 / 开头的实际文件的路径。如果在链接末尾添加斜杠,它将显示相应目录的 index.md。
export default defineConfig({

  themeConfig: {
    //侧边栏
    sidebar: [
      {
        //分组标题
        text: '指南',
        items: [
          { text: '前言', link: '/preface' },
          { text: '快速上手', link: '/getting-started' },
          { text: '配置', link: '/configuration' },
          { text: '页面', link: '/page' },
          { text: 'Frontmatter', link: '/frontmatter' },
          { text: 'Markdown', link: '/markdown' },
          { text: '静态部署', link: '/assets' },
        ],
      },
    ],
    },

})侧边栏分组
export default defineConfig({

  themeConfig: {
    //侧边栏
    sidebar: [
      {
        //分组标题1
        text: '介绍',
        items: [
          { text: '前言', link: '/preface' },
        ],
      },
      {
        //分组标题2
        text: '基础配置',
        items: [
          { text: '快速上手', link: '/getting-started' },
          { text: '配置', link: '/configuration' },
          { text: '页面', link: '/page' },
          { text: 'Frontmatter', link: '/frontmatter' },
        ],
      },
      {
        //分组标题3
        text: '进阶玩法',
        items: [
          { text: 'Markdown', link: '/markdown' },
          { text: '静态部署', link: '/assets' },
        ],
      },
    ],
  },

})可以进一步将侧边栏项目嵌入到 6 级深度,从根级别上计数。请注意,深度超过 6 级将被忽略,并且不会在侧边栏上显示。
export default {
  themeConfig: {
    sidebar: [
      {
        text: 'Level 1',
        items: [
          {
            text: 'Level 2',
            items: [
              {
                text: 'Level 3',
                items: [
                  ...
                ]
              }
            ]
          }
        ]
      }
    ]
  }
}多侧边栏
可能会根据页面路径显示不同的侧边栏。例如,如本站点所示,可能希望在文档中创建单独的侧边栏,例如“指南”页面和“配置参考”页面。
为此,首先将你的页面组织到每个所需部分的目录中:
.
├─ guide/
│  ├─ index.md
│  ├─ one.md
│  └─ two.md
└─ config/
   ├─ index.md
   ├─ three.md
└─ four.md然后,更新配置以定义每个部分的侧边栏。这一次,应该传递一个对象而不是数组。
export default {
  themeConfig: {
    sidebar: {
      // 当用户位于 `guide` 目录时,会显示此侧边栏
      '/guide/': [
        {
          text: 'Guide',
          items: [
            { text: 'Index', link: '/guide/' },
            { text: 'One', link: '/guide/one' },
            { text: 'Two', link: '/guide/two' }
          ]
        }
      ],

      // 当用户位于 `config` 目录时,会显示此侧边栏
      '/config/': [
        {
          text: 'Config',
          items: [
            { text: 'Index', link: '/config/' },
            { text: 'Three', link: '/config/three' },
            { text: 'Four', link: '/config/four' }
          ]
        }
      ]
    }
  }
}侧边栏分组折叠
如果需要可折叠的,添加 collapsed选项,它会显示一个切换按钮来隐藏/显示
export default defineConfig({

  themeConfig: {
    //侧边栏
    sidebar: [
      {
        text: 'Section Title A',
        collapsed: false,
        items: [...]
      },
    ],
  },

})默认情况下,所有部分都是“打开”的。如果希望它们在初始页面加载时“关闭”,请将 collapsed 选项设置为 true。
export default {
  themeConfig: {
    sidebar: [
      {
        text: 'Section Title A',
        collapsed: true,
        items: [...]
      }
    ]
  }
}侧边栏(移动端)
更改手机端菜单文字显示,默认 Menu
export default defineConfig({

  themeConfig: {
    //侧边栏文字更改(移动端)
    sidebarMenuLabel:'目录',
    },

})返回顶部
更改手机端菜单文字显示,默认 Return to top
export default defineConfig({

  themeConfig: {
    //返回顶部文字修改
    returnToTopLabel:'返回顶部',
    },

})大纲
右侧的大纲,默认显示是二级标题,通过设置 outline 实现多级标题
信息 设置到六级标题可以用
'deep',关闭false
export default defineConfig({

  themeConfig: {
    //大纲显示2-3级标题
    outline:[2,3],
  },

})大纲顶部的 标题 可以通过设置 outlineTitle 实现
export default defineConfig({

  themeConfig: {
    //大纲顶部标题
    outlineTitle:'当前页大纲',
  },

})编辑本页
警告 会被 Frontmatter配置 覆盖
export default defineConfig({

  themeConfig: {
    //编辑本页
    editLink: {
      pattern: 'https://github.com/vuejs/vitepress/edit/main/docs/:path',
      text: '在GitHub编辑本页'
    },
  },

})提示 将
pattern的链接修改成自己的仓库
上次更新
如果你想添加页面的更新时间就配置,否则默认是 false
export default defineConfig({

  lastUpdated: true, //此配置不会立即生效,需git提交后爬取时间戳,本地报错可以先注释

  themeConfig: {
    //上次更新时间
    lastUpdatedText:'上次更新',
  },

})上下页
默认从侧边栏配置中读取,如果想单独关闭或自定义请参照 Frontmatter
信息 仅修改显示的文字
Pagina prior可以改成 上一页Proxima pagina可以改成 下一页
export default defineConfig({

  themeConfig: {
    //自定义上下页名
    docFooter: {
      prev: '上一页',
      next: '下一页',
    },
  },

})广告
VitePress 内置了对 Carbon 广告 的原生支持
通过在配置中定义Carbon 广告凭证,VitePress将在页面上展示广告
export default defineConfig({

  themeConfig: {
    carbonAds: {
      code: 'your-carbon-code',
      placement: 'your-carbon-placement',
    },
  },

})这些值用于调用 carbon CDN 脚本,如下所示。
`//cdn.carbonads.com/carbon.js?serve=${code}&placement=${placement}`插件
时间线
采用了 @HanochMa 的项目
仓库:https://github.com/HanochMa/vitepress-markdown-timeline
Demo:https://hanochma.github.io/daily/2023-04
npm install vitepress-markdown-timeline在 config.mts 中注册 markdown 解析插件
import timeline from "vitepress-markdown-timeline";

export default {
  markdown: {
    //行号显示
    lineNumbers: true,

    //时间线
    config: (md) => {
      md.use(timeline);
    },
  },
}在 .vitepress/theme/index.ts 中引入时间线样式
信息 如果你没有这个文件,就自己新建
最后我们在markdown文件中,按格式使用即可
输入:
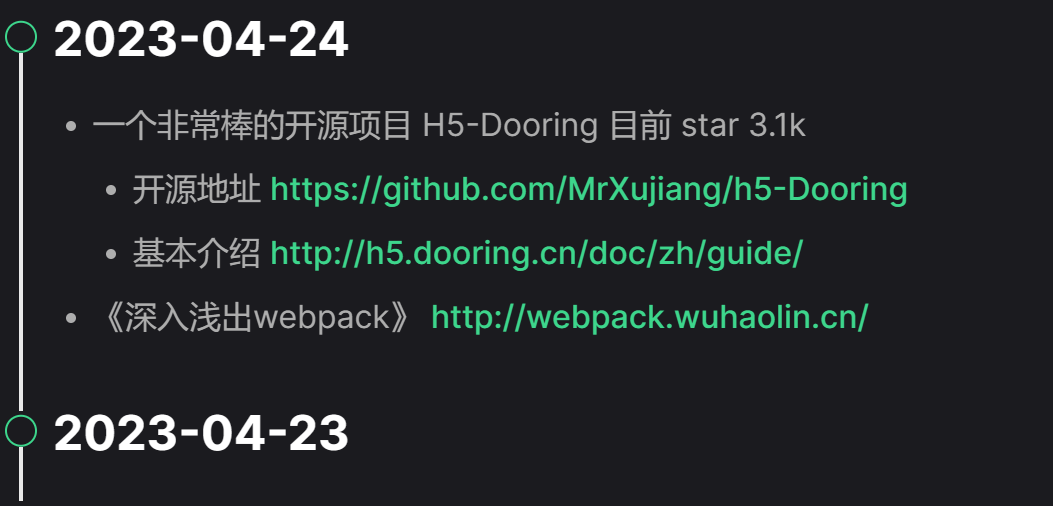
::: timeline 2023-04-24
- 一个非常棒的开源项目 H5-Dooring 目前 star 3.1k
  - 开源地址 https://github.com/MrXujiang/h5-Dooring
  - 基本介绍 http://h5.dooring.cn/doc/zh/guide/
- 《深入浅出webpack》 http://webpack.wuhaolin.cn/
:::

::: timeline 2023-04-23
:::
不蒜子-浏览量
我对这个并不感冒,看了一下,基本上是用的 不蒜子
但是想要好看就得自己封装一下
npm install busuanzi.pure.js// .vitepress/theme/index.ts
import DefaultTheme from 'vitepress/theme'
import { inBrowser } from 'vitepress'
import busuanzi from 'busuanzi.pure.js'
export default {
extends: DefaultTheme,
enhanceApp({ app , router }) {
if (inBrowser) {
router.onAfterRouteChanged = () => {
busuanzi.fetch()
}
}
},
}使用就很简单了,也可以自己写个好看点的组件
本站总访问量 <span id="busuanzi_value_site_pv" /> 次
本站访客数 <span id="busuanzi_value_site_uv" /> 人次封装vue组件
要封装一个美观的浏览量和访客数显示组件,可以创建一个 Vue 组件,并在 VitePress 中使用它。下面是一个示例,展示如何实现这个功能:
1. 安装 busuanzi.pure.js
首先,确保 busuanzi.pure.js 已安装:
npm install busuanzi.pure.js2. 创建自定义组件
在 .vitepress/theme 目录下创建一个新的 Vue 组件文件 Busuanzi.vue:
<template>
  <div class="busuanzi-wrapper">
    <div class="busuanzi-item">
      本站总访问量 <span id="busuanzi_value_site_pv" /> 次
    </div>
    <div class="busuanzi-item">
      本站访客数 <span id="busuanzi_value_site_uv" /> 人次
    </div>
  </div>
</template>

<script lang="ts" setup>
import { onMounted } from 'vue'
import busuanzi from 'busuanzi.pure.js'

onMounted(() => {
  busuanzi.fetch()
})
</script>

<style scoped>
.busuanzi-wrapper {
  display: flex;
  flex-direction: column;
  align-items: center;
  margin-top: 20px;
}

.busuanzi-item {
  margin: 5px 0;
  font-weight: bold;
  font-size: 14px;
  color: #333;
}

.busuanzi-item span {
  color: #42b983;
}
</style>3. 修改 .vitepress/theme/index.ts
在 .vitepress/theme/index.ts 文件中注册并使用这个自定义组件:
import DefaultTheme from 'vitepress/theme'
import Busuanzi from './components/Busuanzi.vue'

export default {
  ...DefaultTheme,
  enhanceApp({ app, router }) {
    app.component('Busuanzi', Busuanzi)
    if (inBrowser) {
      router.onAfterRouteChanged = () => {
        busuanzi.fetch()
      }
    }
  },
}4. 在页面中使用组件
现在,你可以在你的 Markdown 文件中使用这个新组件来显示浏览量和访客数:
# 首页

<Busuanzi />这段代码会在页面上插入一个美观的浏览量和访客数显示区域。
5. 完整代码
Busuanzi.vue:
<template>
  <div class="busuanzi-wrapper">
    <div class="busuanzi-item">
      本站总访问量 <span id="busuanzi_value_site_pv" /> 次
    </div>
    <div class="busuanzi-item">
      本站访客数 <span id="busuanzi_value_site_uv" /> 人次
    </div>
  </div>
</template>

<script lang="ts" setup>
import { onMounted } from 'vue'
import busuanzi from 'busuanzi.pure.js'

onMounted(() => {
  busuanzi.fetch()
})
</script>

<style scoped>
.busuanzi-wrapper {
  display: flex;
  flex-direction: column;
  align-items: center;
  margin-top: 20px;
}

.busuanzi-item {
  margin: 5px 0;
  font-weight: bold;
  font-size: 14px;
  color: #333;
}

.busuanzi-item span {
  color: #42b983;
}
</style>.vitepress/theme/index.ts:
import DefaultTheme from 'vitepress/theme'
import Busuanzi from './components/Busuanzi.vue'
import { inBrowser } from 'vitepress'
import busuanzi from 'busuanzi.pure.js'

export default {
  ...DefaultTheme,
  enhanceApp({ app, router }) {
    app.component('Busuanzi', Busuanzi)
    if (inBrowser) {
      router.onAfterRouteChanged = () => {
        busuanzi.fetch()
      }
    }
  },
}- 在 Markdown 文件中使用组件:
# 首页

<Busuanzi />通过这些步骤,你将能够在 VitePress 网站中创建一个美观的浏览量和访客数显示组件。
贡献者
 MGHY
MGHY